
Reading Time: 5 minutes
Did you ever wonder where all of the UNESCO World Heritage Sites are located? Me too, since I recently just stumbled over one without even knowing that the place was on the list. Of course, there is the only list of the UNESCO and they even have an interactive map. But how about you could put this map in your pocket. I checked on Google Play Store and there are apps which supposedly give you a list of world heritage sites. However, either they put out more ads than sites, don’t work right anymore, or just seem suspicious.
There is an official app from UNESCO but it is more to show publications and videos from sites all over the world. It’s not a bad app but it comes with in-app purchases for subscription of their magazine and more. If you are hardcore fan and world heritage enthusiast, you might want to give it a try.
The app is no longer available. If someone knows about a new official app, let me know in the comments.
I have a pretty easy, quick, and lightweight solution for you. Everything you need, you probably already have on your smartphone. You only need two things.
- A Google Account
- Google Maps on your smartphone
Here’s what we will do: We will create our own map with all world heritage sites which you can then view on your smartphone via the Google Maps app or just via the browser on any PC or smart device.
Step by Step Guide to map the World Heritage Sites
- Register for a Google Account if you don’t have one yet.
- Go to the UNESCO Homepage and download the list of World Heritage Sites as XLS.

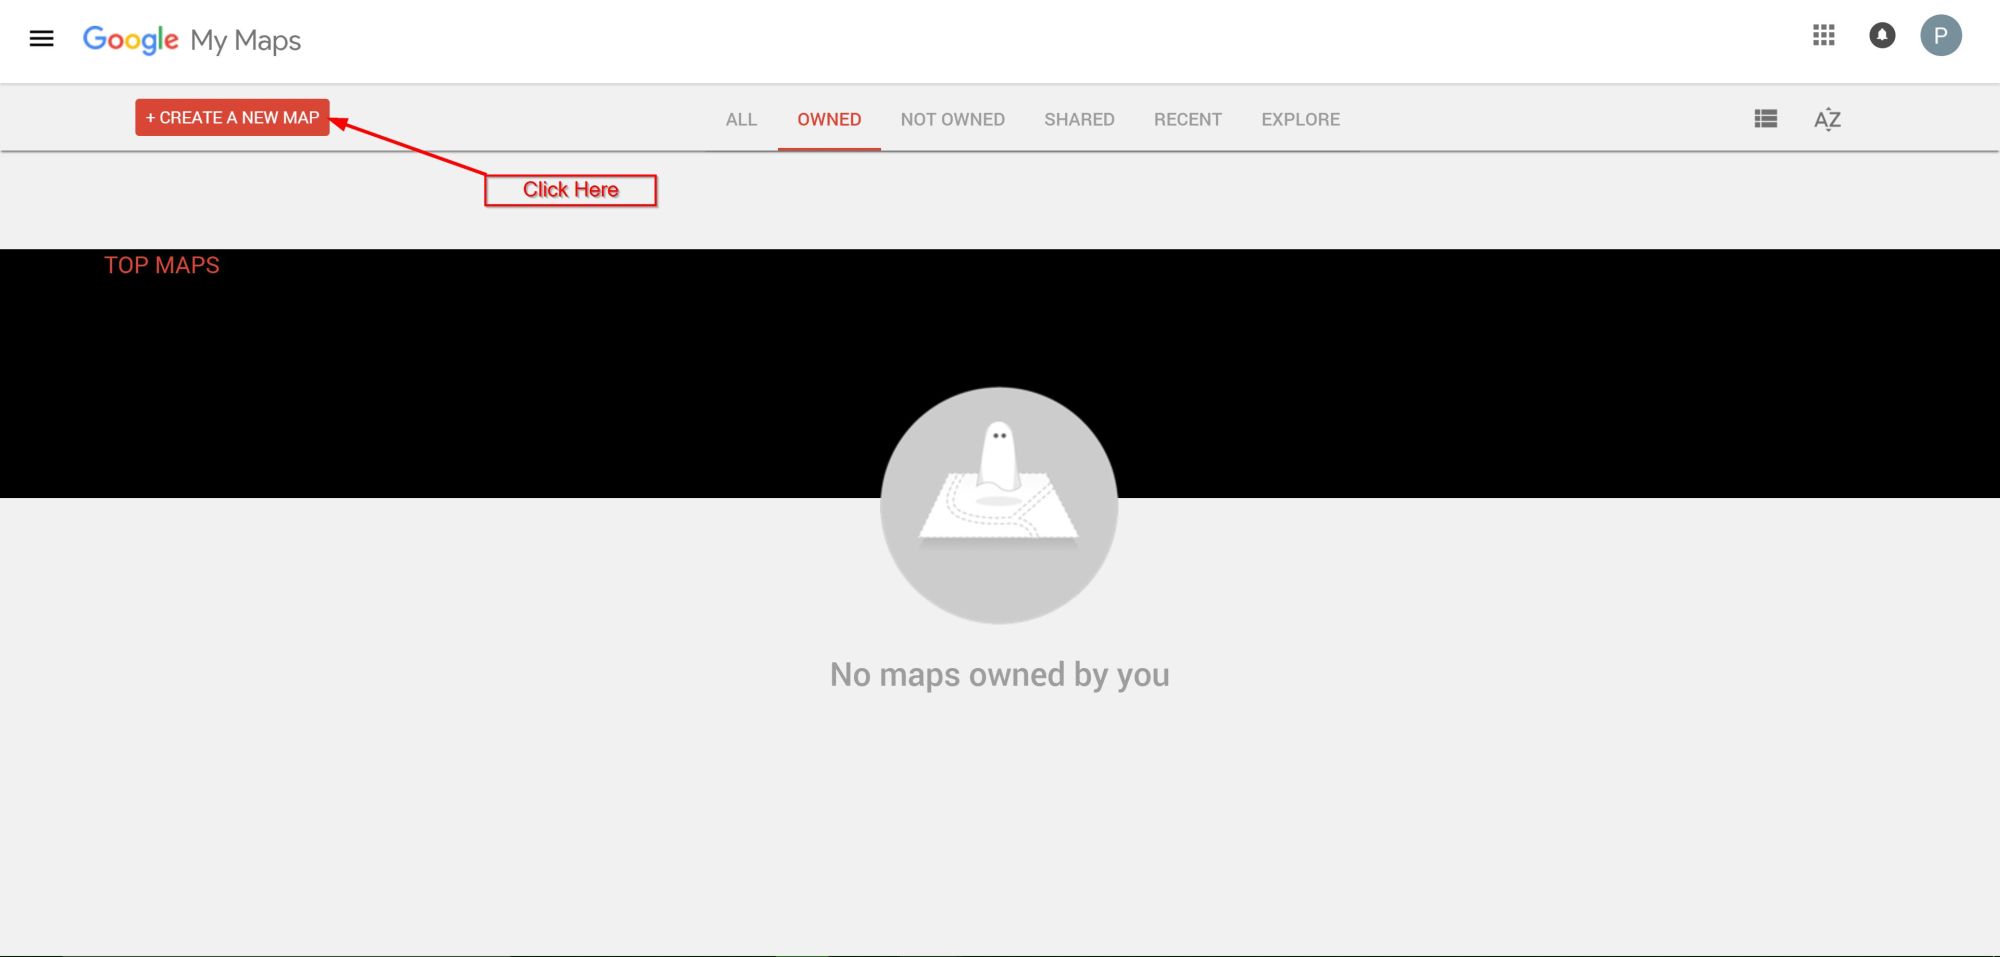
Download the XLS file and save it to your PC. - Open Google My Maps and select create a new map.

Click on “Create A New Map“ - In the next window we will import the file you downloaded in step 2. Click import on the left side of the screen and then select the file.

Click Import and select the file you downloaded before. - After the import is done a window will pop up. Make sure there is only “longitude” and “latitude” checked in the list. Nothing else. Then click continue.

Only check these two. - The next dialog box asks you to select a field for the naming of the different places. I recommend you to select either “name_en” for English names or “name_fr” for French names. Whatever you prefer. If you click on the “?” behind the fields, it will show you some example names of the list.

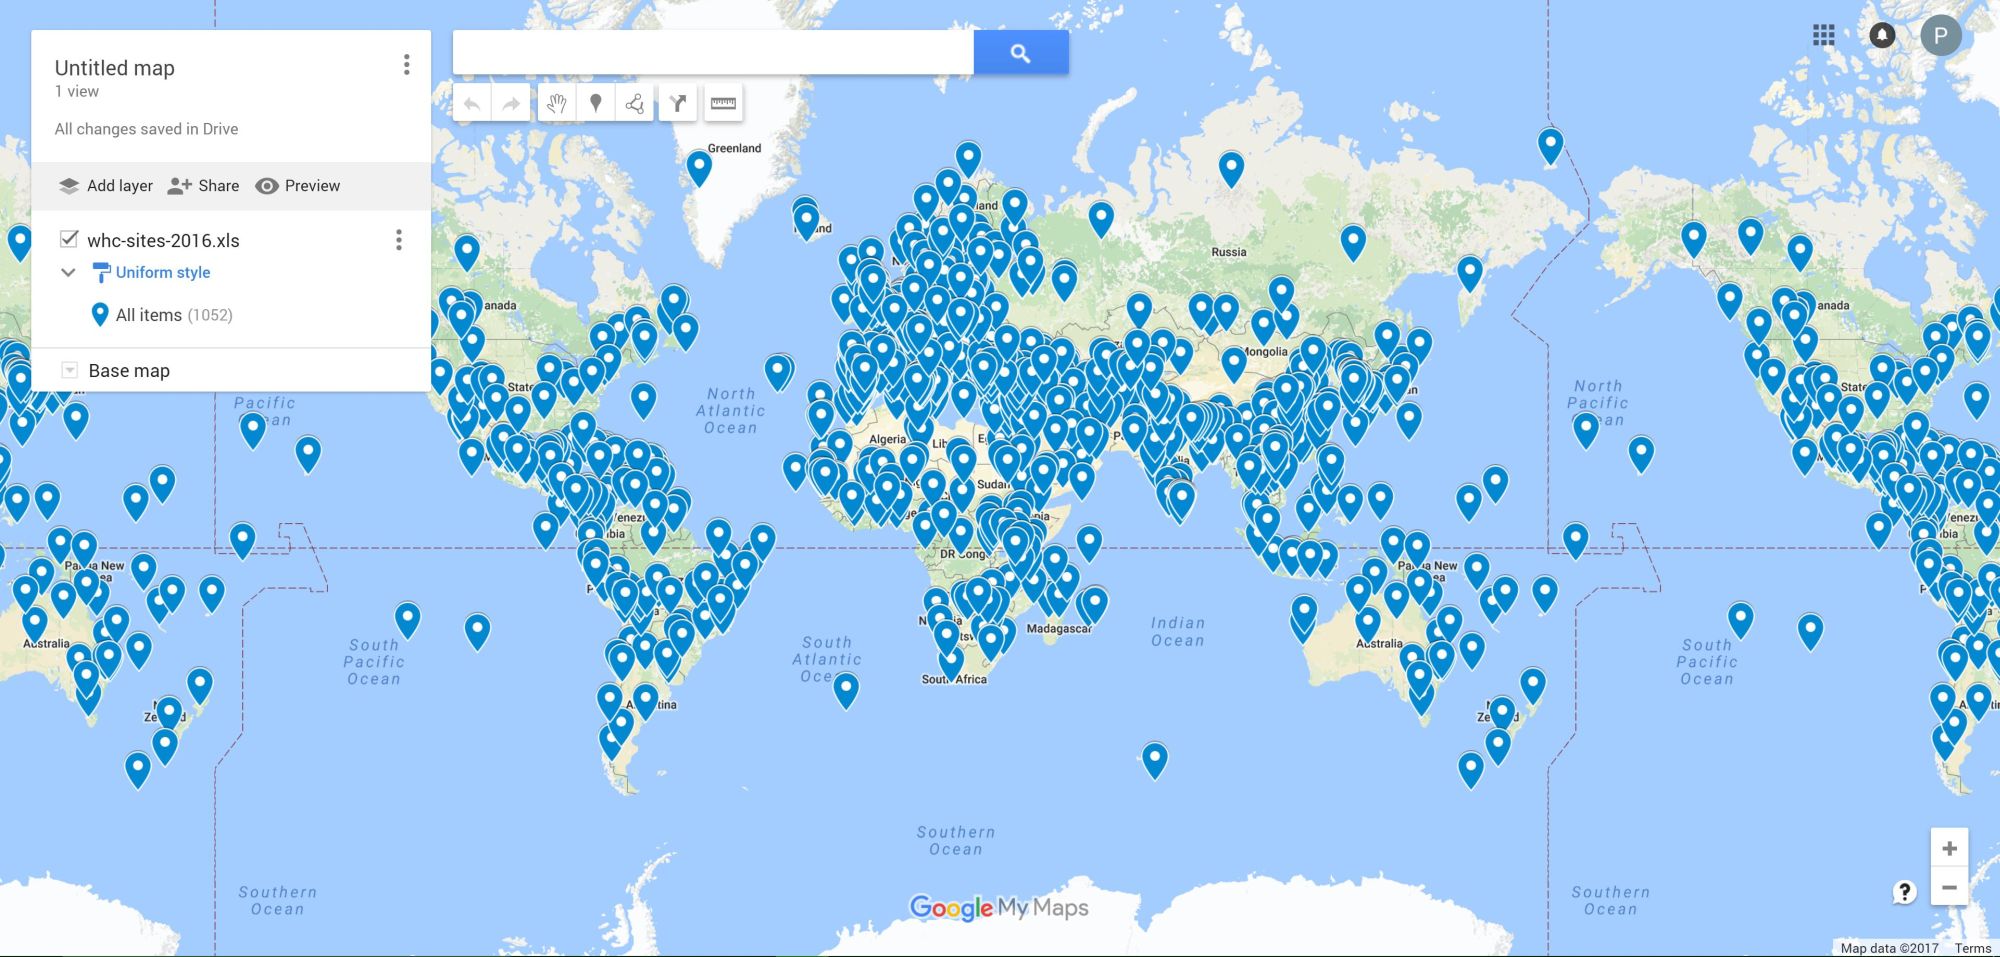
Select the naming of the places. - It will take a few seconds and Google will import the data. After that, you should see a map with markers.

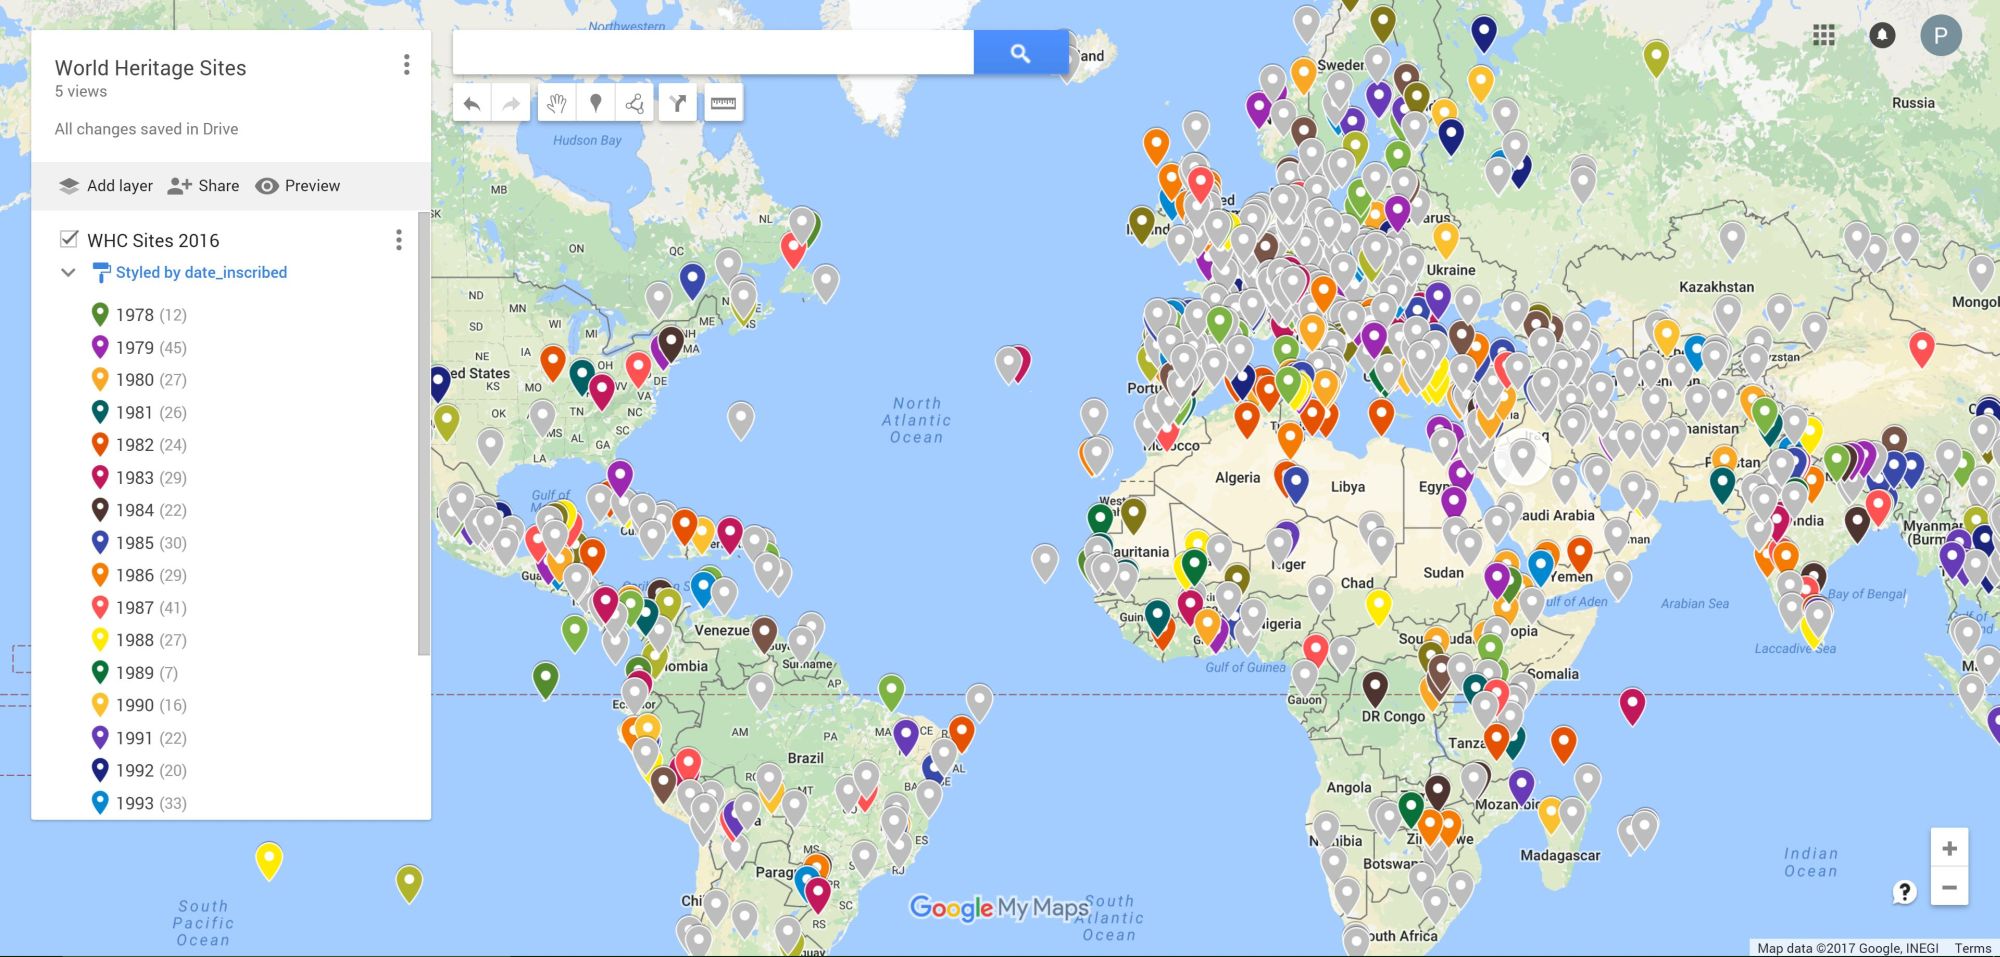
Finished map after import. - The only thing left is now some cosmetics. I would recommend you to rename the map from “Untitled map” to something like “World Heritage Sites”

Rename the map - Next, you should also rename the Layer with the list of sites. This is optional but makes for a better look. I called it “WHC Sites 2016“. Click on the 3 dots next to the current layer name and select “Rename Layer“.

Rename the Layer - Optional changes: Underlying Base Map, Marker Icons and naming of the markers. However, because of the high number of markers, I would not name them. You will see all the information once you click on a marker.
- Now you have a map of all World Heritage Sites in the world always ready to view. To view it in your browser just open it via Google’s MyMaps. This works with any browser on any device, even your smartphone.
- To get a better view of the sites you can view them in the
MyMaps appor you use Google Maps.
Unfortunately, Google discontinued the MyMaps app. My Maps is now only accessible through the web interface in a browser.
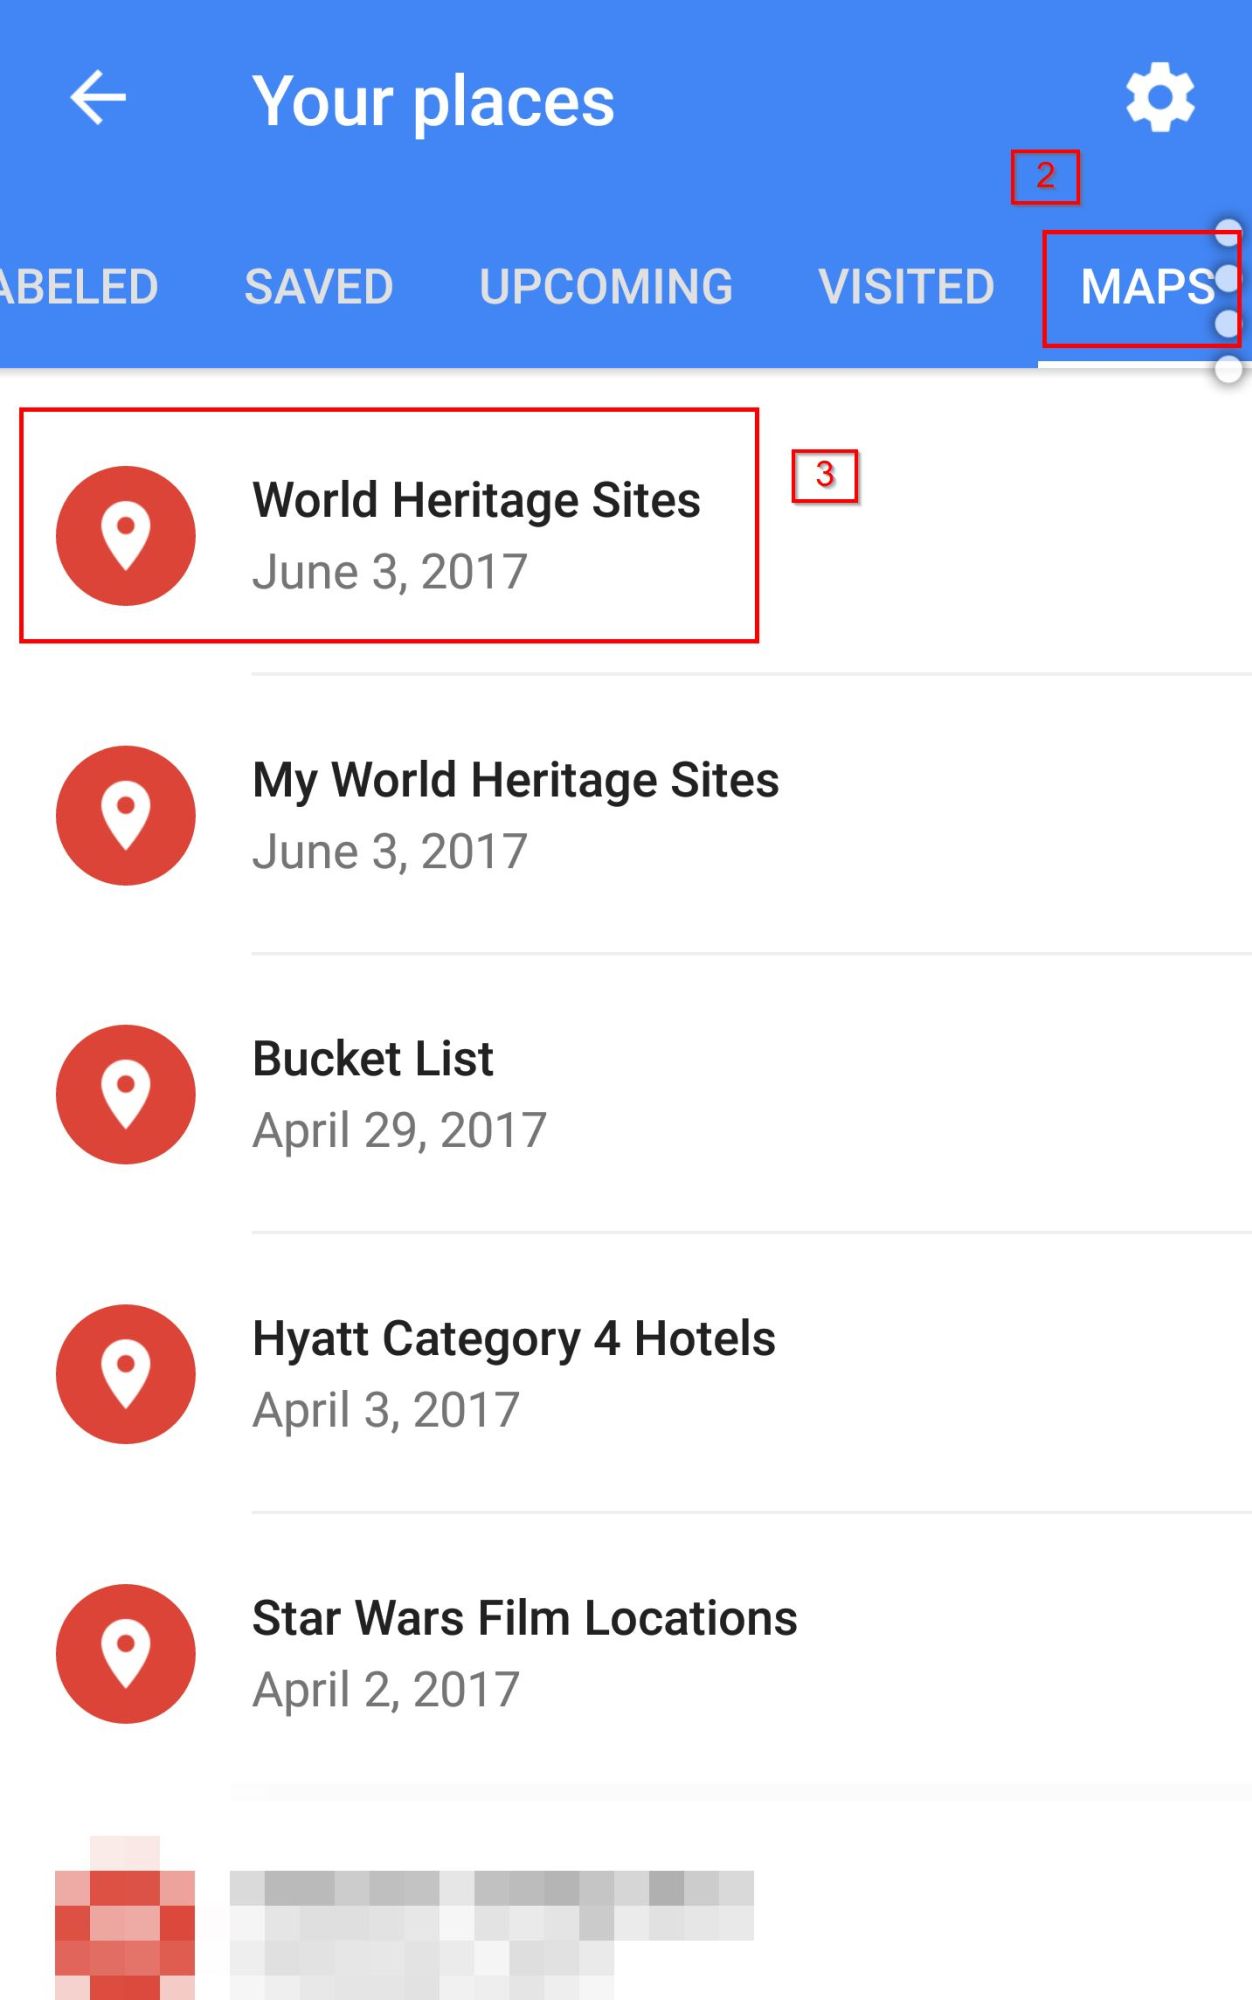
To get the map you just created in Google Maps, you have to do some more extra steps. - First, open your menu in Google Maps. Select “Your places” and then the tab “Maps“. Now your just created map should appear on the very top of the list or just browse through the list if you have more than just one map.


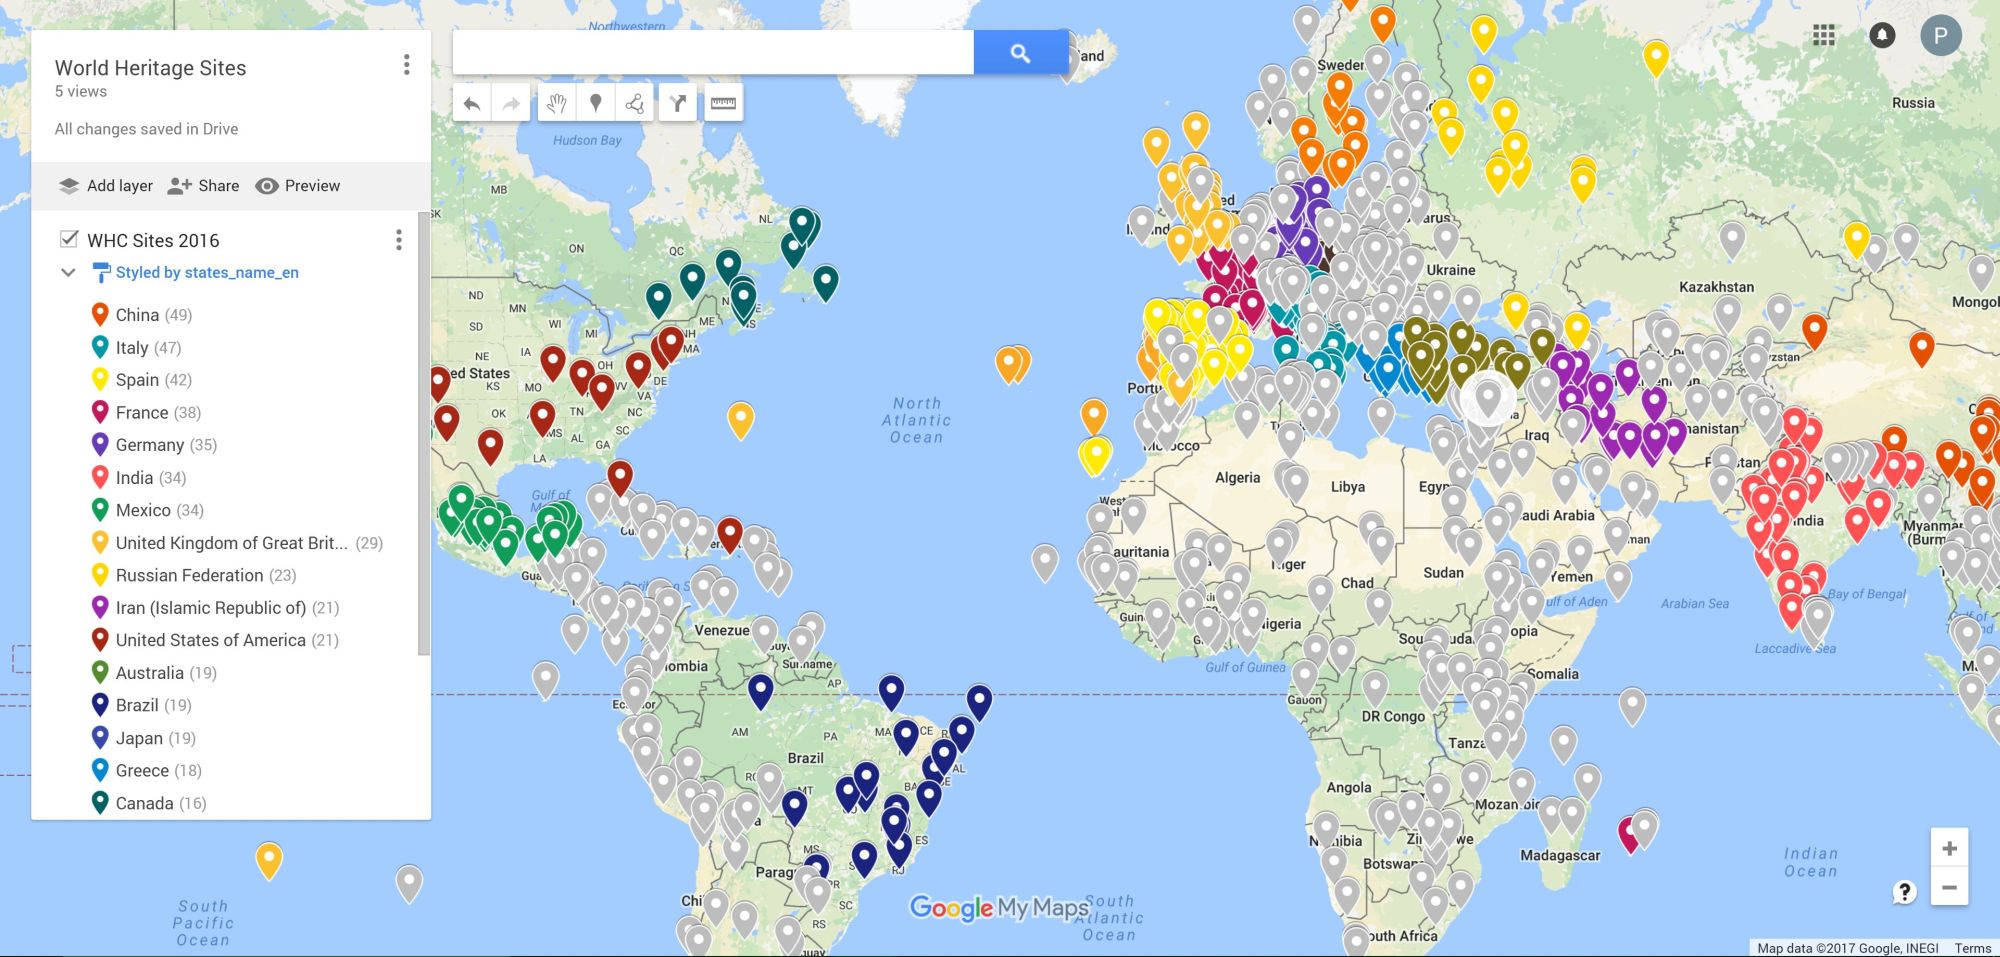
Styling the Map
I mentioned earlier that you can change the marker color or even completely replace it with a different one. That is not all. Because the file we imported has all kinds of information in it, you can very easily style the map by Heritage Category. There are three categories.
- Cultural
- Natural
- Mixed
Styling the map after this three categories is very easy. Below your layer title “WHC Sites 2016 (or whatever you named it before)” it should say “Uniform style“. Click this label and in the pop up open the dropdown list under “Group places by”. Scroll through the list and select “category”. Done!

A few more examples how you can style your map.


I hope this tutorial was easy to follow and helped you create a map of all World Heritage sites. I created an extra map with all the World Heritage Sites I already visited. If you have any questions or problems just put them in the comments below.

Peter has a passion for Traveling, Photography, and Geocaching. These are the best ingredients for amazing adventures all over the globe. “Traveling is fun, no matter if you stay in a luxury hotel or travel like a backpacker.” Peter shares his experiences on his Blog www.gatetoadventures.com
Some of Peter’s photos are published on corporate websites, in-flight magazines, travel guides, and much more.


Subscribe
5 Comments
Thank you so much. The KML doesn’t work unitl i read this.
You are very welcome! Glad I could help.
Thank you for this amazing tip!
Any time. Glad that I could help…
Amazing! Thank you!